Newsletter
Humzor NEXZDAS PRO User Registration Guidance
Matched product:
EU Ship No Tax Humzor NexzDAS Pro 9.6inch Obd2 Car Diagnostic Tool Bluetooth Support IMMO/ABS/EPB/SAS/DPF/Oil Reset Full System Automotive Scanner
€207.00
- Item No. SP353
- Free Shipping
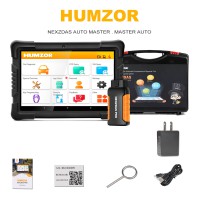
Humzor Nexzdas Pro is a high-end & professional intelligent diagnostic equipment. The tablet has 9.6-inch screen and running with Android 9.0 and 2.0g CPU octa core, which provide users with a simple and friendly operation interface. It will meet the needs of auto aftermarket users, because it is able to perform all-system diagnosis, OBDII scan, coding, Immo key programming and 9 special functions (including Oil service reset, ABS Bleeding, BMS reset, DPF, EPB, Injector Coding, TPMS, SAS, TPS), which provides more comprehensive and accurate solution for the professional technicians who are working in the auto repair service stations, individuals’ small repair shops, as well as improving their work efficiency and the satisfaction of car owners.
Some users feedback they are confused on how to use Humzor NEXZDAS PRO, especially the user registration, Serial Number binding. Therefore, our engineers work out a sheet of user manual below.
Humzor NEXZDAS PRO User Registration
When you access to the “NEXZDAS” application for the first time, you need to follow the steps below to register:
- Click on “NEXZDAS” icon on the desktop to open the application.
- On the Login interface, click on “Register” button to enter the registration interface.
- Enter your mailbox in the “Email” column.
- Click on “GET CAPTCHA” button to get your captcha.
- Enter the captcha you obtained in the “CAPTCHA” column.
- Set up your password in the “Enter password” field, and enter your password again in the “Confirm Password” field.
- Click the “->” button at the bottom, once your email account, captcha, and password format are entered correctly, then the registration will be successful.
User Login:
After registering, please log in, there are 5 steps to follow:
- Double click on “NEXZDAS” icon on the desktop.
- Enter the email in the “E-mail” column.
- Enter your login password in the “Password” column.
- Click on the icon to process
- Click on the “Login” button. Once you entered the correct account and password, login will succeed and the system will take you to the serial number binding and selection interface.
Change Password
If you forget your password or need to set a new password, please follow the steps below:
- Double click on “NEXZDAS” icon on the desktop.
- On the login and registration interface, click on “Forget Password?” button to enter the password reset interface.
- Enter your login account in the “Account” field.
- Click the “GET CAPTCHA” button to get your captcha.
- Enter the captcha you obtained in the “CAPTCHA” field.
- Enter your new password in the “Input the new password” field, and enter your new password again in the “Input the Password again” field.
- Click the “->” button at the bottom, once your account, captcha, and password format are entered correctly, then the new password is set successfully.
To Bind Humzor NEXZDAS PRO
Method 1. Manually input
- Click on “Add a new product” button and the “Binding serial number” interface will pop up.
- Enter the serial number (S/N) of the device you purchased in the “Serial number” field, and enter the Activation code of the device in the “activation code” field.
- Click on “Okay” button. If the serial number and activation code you entered are as the same as the serial number and activation code of the purchased device, the binding is successful.
Method 2. Scan code to binding
- Click on “Add a new product” and the “Binding serial number” interface will pop up.
- Click on the scan code icon on the right side of the “activation code” column to open the scan interface.
- Align the QR code of the device you purchased, and if the code is scanned successfully, the serial number will be automatically bound.